Christmas wreath, teatime treat…

Christmas…. Whip up this quick and easy very visual Christmas tea time treat, serve it anytime from now till Christmas and spread some Christmas magic.

Some years we have a “big” Christmas and other years we tone it down a bit… and even with a “toned down” Christmas, this delicious tea time treat will put big smiles around you….

4. christmas wreath.jpg

Printable PDF recipe cardChristmas wreath teatime treat…. RECIPE CARD

IMG_2112
For the Teatime wreath you will need:

1 x roll of good quality puff pastry
1/3 cup apricot jam
+/-300g Glaze luxury fruit mix
OR luxury fruitcake mix
handful flaked almonds
zest of 1 lemon
zest of 1 orange

For the Icing:
1/2 cup sifted icing sugar
2 tbsp lemon juice

1 x egg mixed in a cup for brushing

To serve…. luke warm custard…

Defrost the puff pastry overnight in your fridge or for +/- 2 hours at room temperature.

2. Christmas wreath.jpg

In advance:

Open the pastry on a flat surface on a clean tea towel, do not roll out flatter. Spread the jam evenly over the full area of the puff pastry sheet. Scatter the Glaze fruit mix evenly over the pastry sheet, leaving +/- 2cm’s on all sides.

Grate the lemon and orange zest over the glaze fruit mix and add the almonds. At this stage anything else can be added, I think of maybe orange peel, slices for preserved green figs…. endless but optional.

5. christmas wreath

Roll up “swiss roll size” from the longer side, using the tea towel to assist with the rolling. Cover with cling wrap and refrigerate until needed.

Before serving:

Remove the clingwrap. Grease your baking tray, position a 6 – 8 cm tin in the middle of your baking tray to assist in packing the circle. Cut 3cm thick slices of the pastry roll and arrange around the tin, once done, remove the tin and brush the pastry ring with a little bit of beaten egg. Bake at 180 degrees until golden brown, not too dark.

6. christmas wreath.jpg

Remove the baking tray from the oven and let it cool for 15 minutes, slide the wreath off the baking tray onto a pretty flat platter and drizzle with the icing sugar/ lemon juice mixture from +/- 30 cm’s high… if the icing sugar mixture is too thick add a bit more lemon juice.

Serve luke warm with custard…… Christmas perfection!

No 13. christmas day

This wreath looks, smells and taste pure CHRISTMAS MAGIC!

Even the frogs needs a bit of Christmas warmth...

Even the frogs needs a bit of Christmas warmth…

Slow roasted acorn-fed pork shoulder with honey and buttered apples and pears….Christmas with friends…

Christmas, friends, gifts, acorn-fed tender pork shoulder, honey and buttered apples….. what more do you want for a lovely early Christmas get-together with friends to exchange gifts and eat delicious food produced here in our beautiful Valley…

Once a year a couple of our friends get together to celebrate Christmas the weekend before “Christmas”. As usual it will take us a week or two to decide on “what to cook”, this year we outsourced the snacks, starter and desert to two of the other families and myself and Shannon focused on the Main Meal…. we did however demanded Yummy Galore food from the contributors and they knew they had to perform or be scrapped for the invite list, and believe me they did not disappoint…

Shannon decided on a simple yet beautiful and tender acorn-fed pork shoulder for The Pool Room at Oak Valley Estates… wow, what a beautiful piece of meat, you should have seen Shannon handling that lovely shoulder, rubbing it with the lemon salt with true respect…
We are spoiled with various restaurant’s in the Elgin Valley and THE POOL ROOM with chef Nicole Precoudis, is the latest edition to a growing list… they also have a deli and restaurant filled with local produce, flowers, freshly baked breads and bakes, acorn-fed pork, beef and their own Oak Valley Wines.

No 24. w2s the poolroom

No 21. w2w the poolroom deli

For the slow-roasted acorn-fed pork shoulder you need to follow the following steps:
The day before, soak the shoulder in brine…
+/- 3kg or larger acorn-fed pork shoulder with the bone and skin on
1/4 cup sea salt
3/4 cup castor sugar
2.5 litres water
6 bay leaves, rosemary, a hand full of sage leaves or 1 tablespoon of dried sage
1 whole head of garlic with the top cut off to expose the cloves
1/4 cup green peppercorns

Make the brine, by adding the salt, sugar and water to a saucepan, slowly bring to the boil and dissolve the sugar. Remove from the heat and add the cooled liquid to a plastic bowl, big enough to fit and cover the shoulder. Add the bay leaves, rosemary, sage, whole garlic and peppercorns. Prick the shoulder with a skewer and dry the skin. Score the skin at 1cm intervals with a small sharp knife or ask your butcher to do it, rub with salt… Place the shoulder in the brine and refrigerate for 24 hours.

4 hours before serving…
Pre heat the oven to 220 degrees. Remove the shoulder from the fridge and discard the brine. Pat DRY with paper towelling.

Handled and rubbed with LOVE it could not be anything else that tender...

Handled and rubbed with LOVE it could not be anything else than juicy and tender…

Make the Lemon Salt rub..
Make the Lemon Salt Rub by grinding together in a pestle and mortar…
1/3 cup sea salt
2 tablespoons lemon rind
1/3 cup green peppercorns
1 tablespoon olive oil

No 4. christmas with friends

Rub and massage the DRIED shoulder tenderly and with LOVE with the Lemon Salt mixture…work it into the scored/cut skin.
Line a roasting pan with foil, and add 500ml of boiling water, rosemary, sage and bay leaves. Place the shoulder skin side up in the roasting pan. The water should come up +/- 3 – 4cm in the pan. Roast for 35 minutes at 220 degrees. Remove from the oven and cover with foil, REDUCE THE HEAT to 150 degrees. Roast for 3 hours 30 minutes, remove from the oven, uncover the pork and crisp at 200 degrees for a further 30 minutes until crisp. Rest for 15 minutes, remove the skin and cut the skin into smaller pieces to serve as cracking with the sliced tender pork.

For a printable version of the recipe click on the LINK BELOW
Slow-roasted acorn-fed pork Shoulder with Honey buttered apples and pears … RECIPE CARD

No 7. ch5ristmas with friends

We’ve set the table as per Shannon’s instructions, silver and white, while the pork roasted in the oven and finished a couple of bottles of bubbly on the kitchen floor, life like we love it…..

Me in kitchen heaven...

Me in kitchen heaven…

The silver and white themed table...

The silver and white themed table…

Shannon decided to serve the tender pork with sweet honey and buttered apples and pears straight from the farm…
Poach the peeled and cored apples and pears until slightly soft but still firm. Drain and fry on a high heat with 1 and a half tablespoon of butter and a big squirt of honey until golden brown…

Honey and butter like the girls in the kitchen...

Honey and butter like the girls in the kitchen…

We started the afternoon with me and Shannon and the other friends joined us a bit later… the girls all dress up for our dinner…

After dinner it was time for the VERY important “exchanging of gifts”…. thanks to Vissie for being very “willing” to be Father Christmas, I wonder why??

No 27. christmas with friends

So Shannon promised me a scale,( see it is in Vissie’s hand on the pic above) yes I don’t have a kitchen scale and every second day phone her to “weigh” flour ect for me and give me the ml’s…. so when I saw my flat small parcel I gave it back to her, unopened and said “WHERE IS MY SCALE??”, she gave it back and once opened I saw it’s a VERY FANCY flat electronic scale that can take any type of bowl… wow how lucky am I…

And for the “outsourced” desert … a truly decadent triple layered chocolate mousse… to follow on the blog as soon as I can get Elzaan to make it for me again…Elzaan I demanded Yummy and it was “Yummy GALORE”…

nO 29. christmas with friends

Christmas is all about tradition, and this is one tradition I would like to keep…

Sweet potato and phyllo bake ….. Christmas at Bodemloos Kombuis

Thanks to Maryke van Niekerk for sharing this recipe with me, I need to create a “noddy badge” system on my blog to highlight my top 5 recipes, yes….. , it will be real easy to select my top 5, but to start with, this recipe will be right there at the top….

1a

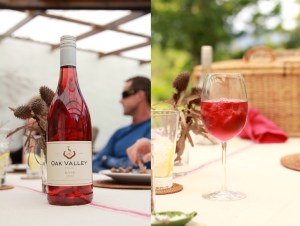
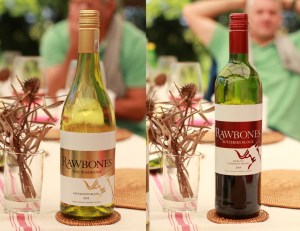
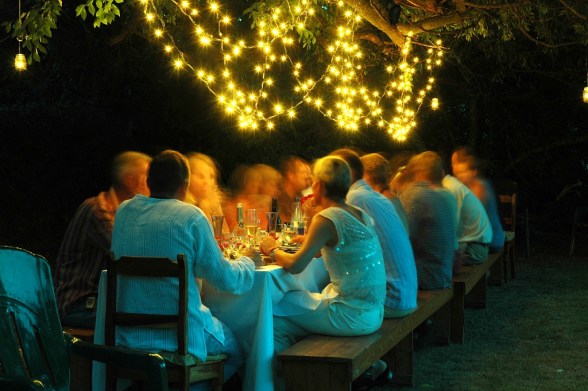
Bodemloos Kombuis, the venue for our Office Christmas Dinner, will stay one of my favourites in our Valley. Looking out over our beautiful Elgin Valley it is ideal for smaller size functions like our recent Office Christmas Dinner. Maryke and Henk’s friendly approachable and enthusiastic nature combined with great food made us return year after year to this venue… and let me not mention the “rolled up lamb spit” and her sweet potato bake and and and…

Bodemloos Kombuis at night...

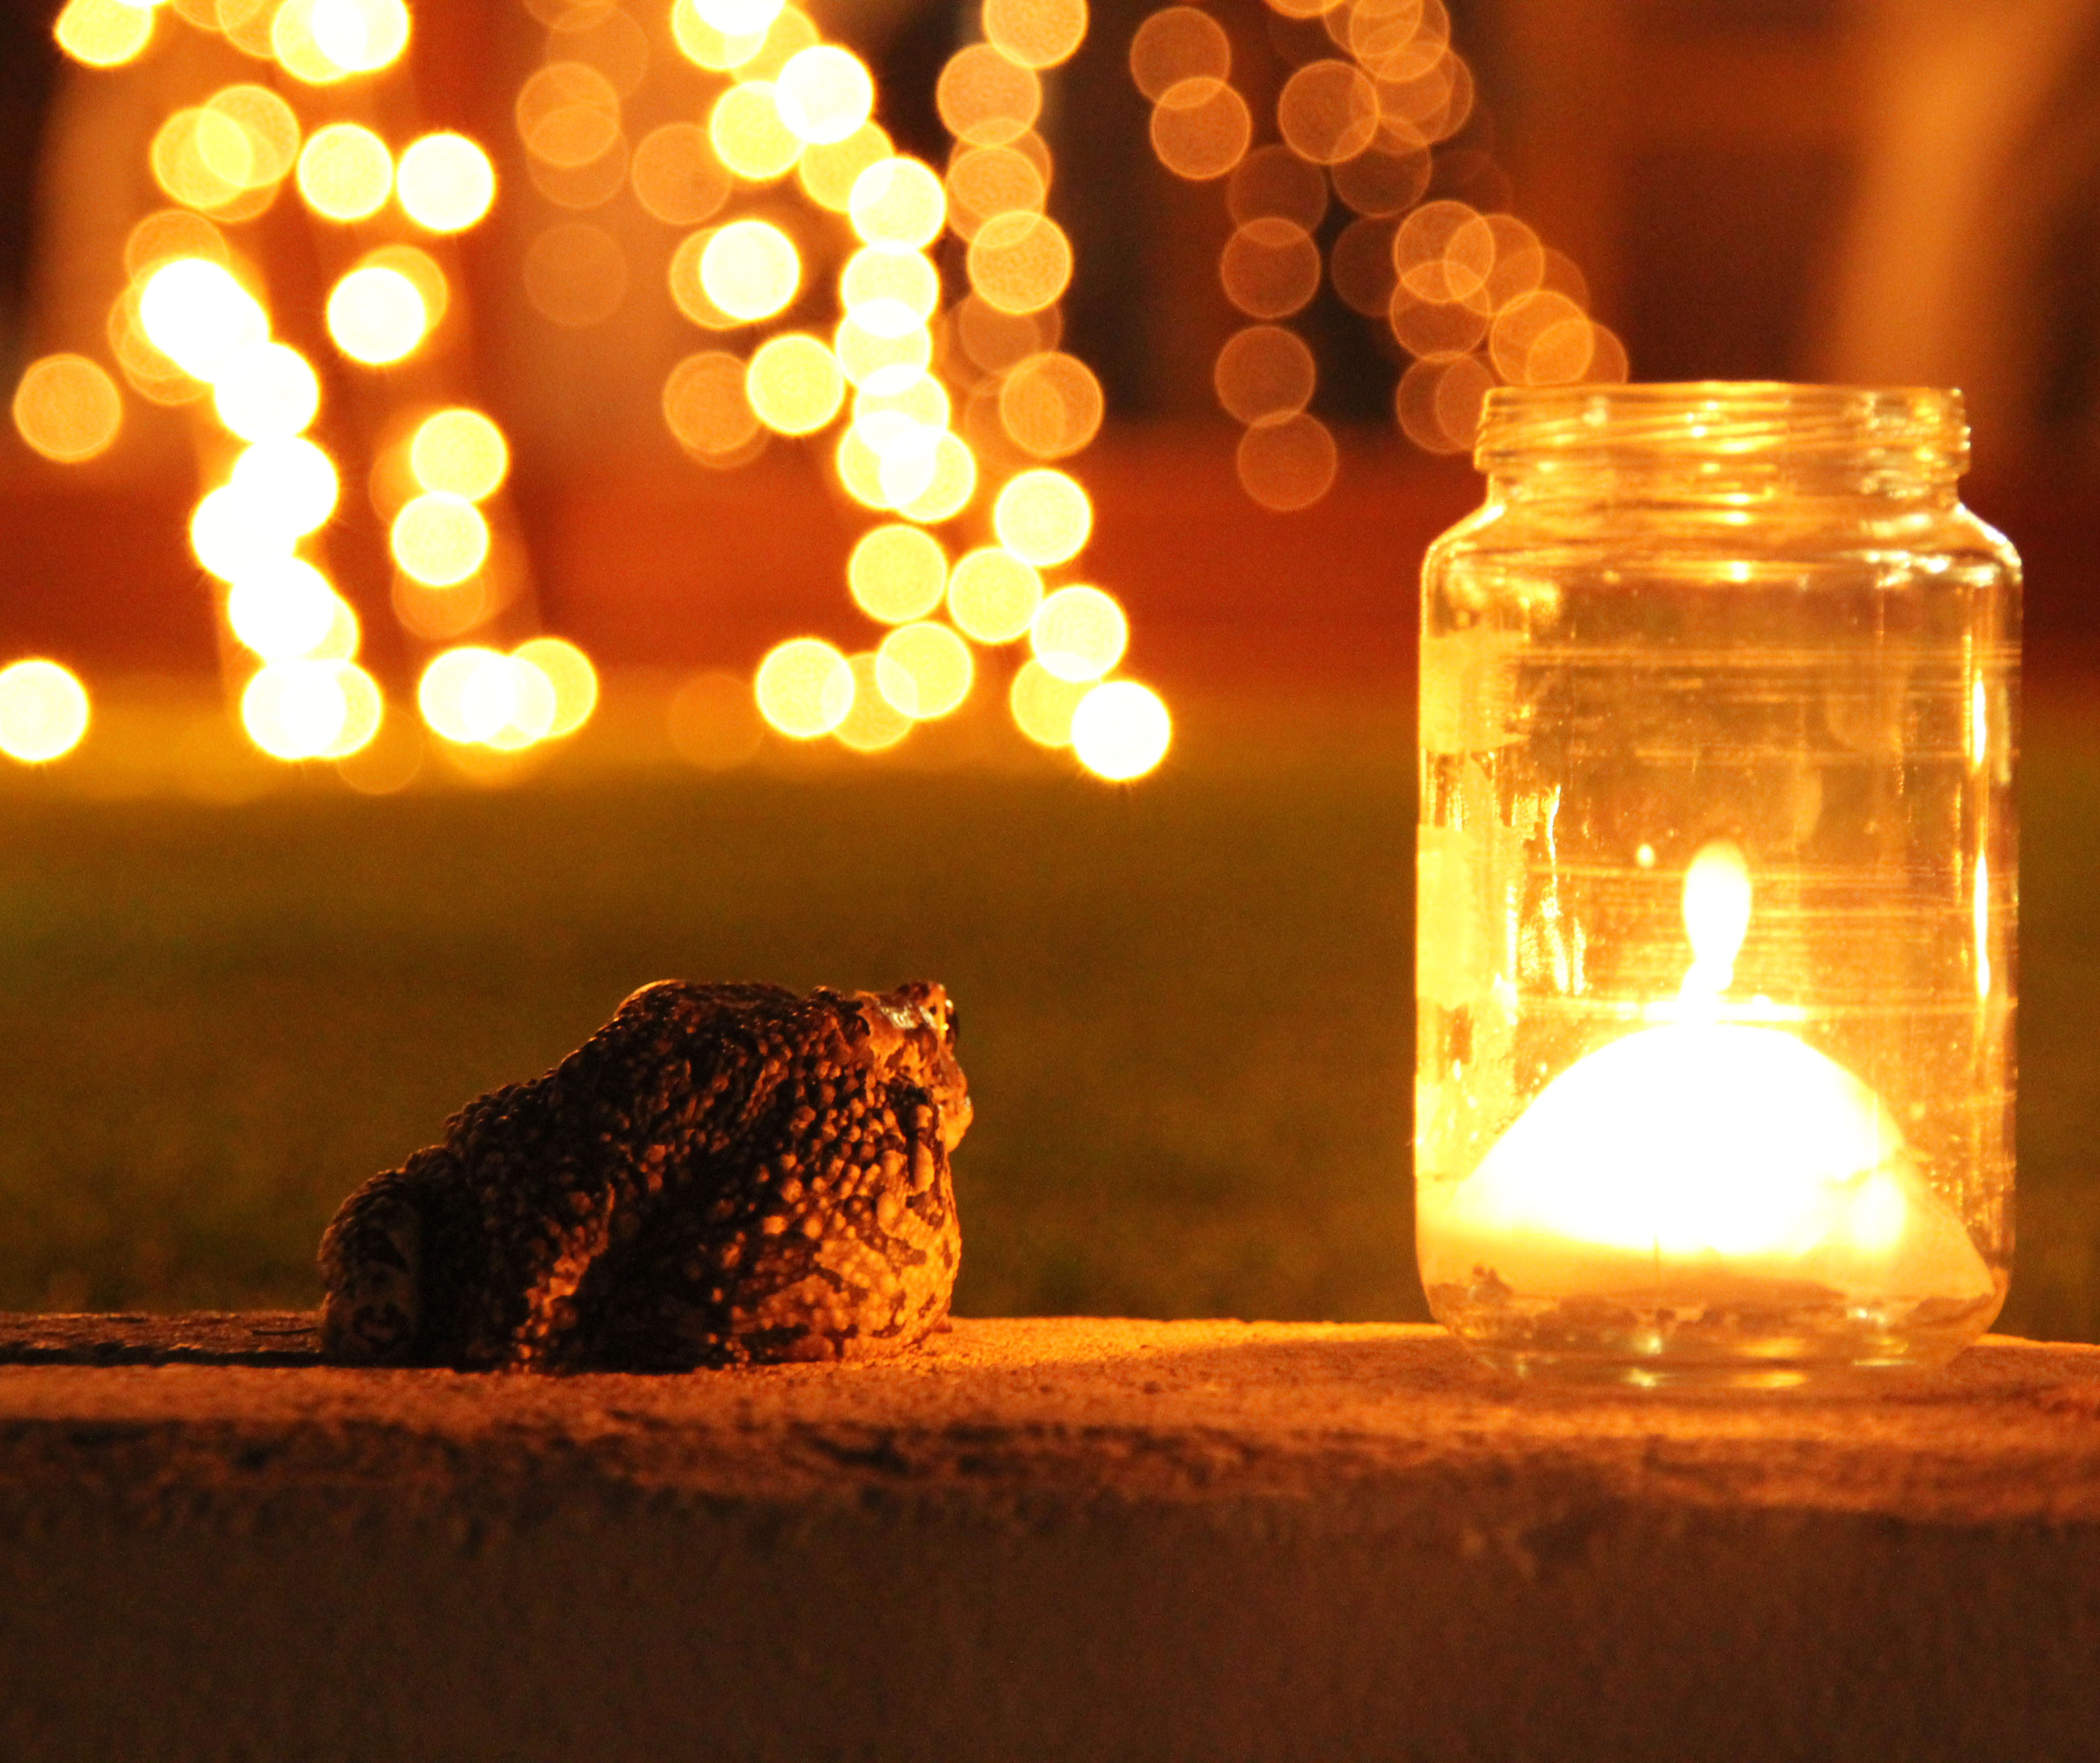
Bodemloos Kombuis at night…

Nicole, our General Manager’s wife, always goes “all out” with creating a real Christmas feel to these dinners, and I once said that she is maybe the only person apart from Shannon (my blog partner) who I will trust blindly with decorating and setting up for a function without any “interference” from my side.

The beautifully decorated tables by Nicole and Maryke...

The beautifully decorated tables by Nicole and Maryke…

Always something different...

Always something different…

For the second year in a row, we’ve selected the Bodemloos Lamb roll on a spit…. and I will put money on it that next year we might choose it again.

Bodemloos Lamb roll on a spit ...

Bodemloos Lamb roll on a spit …

Let’s get back to that Sweet Potato and phyllo bake that accompanied the tender and juicy lamb.

For the Sweet Potato and phyllo bake you will need:

This recipe is for +/- 12 people….

Shortcut sweet potato method

Shortcut sweet potato method

2.5kg sweet potatoes (or a bit more)
125ml or half a cup of butter
187ml brown sugar
125ml golden syrup
one roll of phyllo pastry
+/- 1 cup or tub of cream
125ml brown sugar, half a cup

Cook the sweet potato by your method of choice, basically the “traditional South African” way, and if you don’t know how to do that, follow the easy method below, thanks to Ilse Groenewald for sharing this method with me.

Peel the 2.5kg sweet potatoes, immediately put the peeled sweet potatoes in water to prevent browning. Once peeled slice the sweet potatoes in 5mm thick rings and keep covered with water. In a heavy based pot melt together 125ml butter, 187ml brown sugar and 125ml golden syrup, simmer together for about 5 – 10 minutes until it looks like a slightly thick caramel. Drain the sweet potatoes and add the rings to the simmering caramel. Give the caramel and sweet potatoes a good stir. Add boiling water to “just cover” all the sweet potatoes, this is the strange part, as the traditional method cooks the sweet potato without adding any water. Simmer for about 45 minutes on a low heat without stirring until well cooked and all the water has dissapeared. Keep an eye on it for the last 10 minutes as you only want to cook it until there’s about 1 cm of liquid remaining. Let it cool.

Once cooled completely start rolling the pastry rolls.

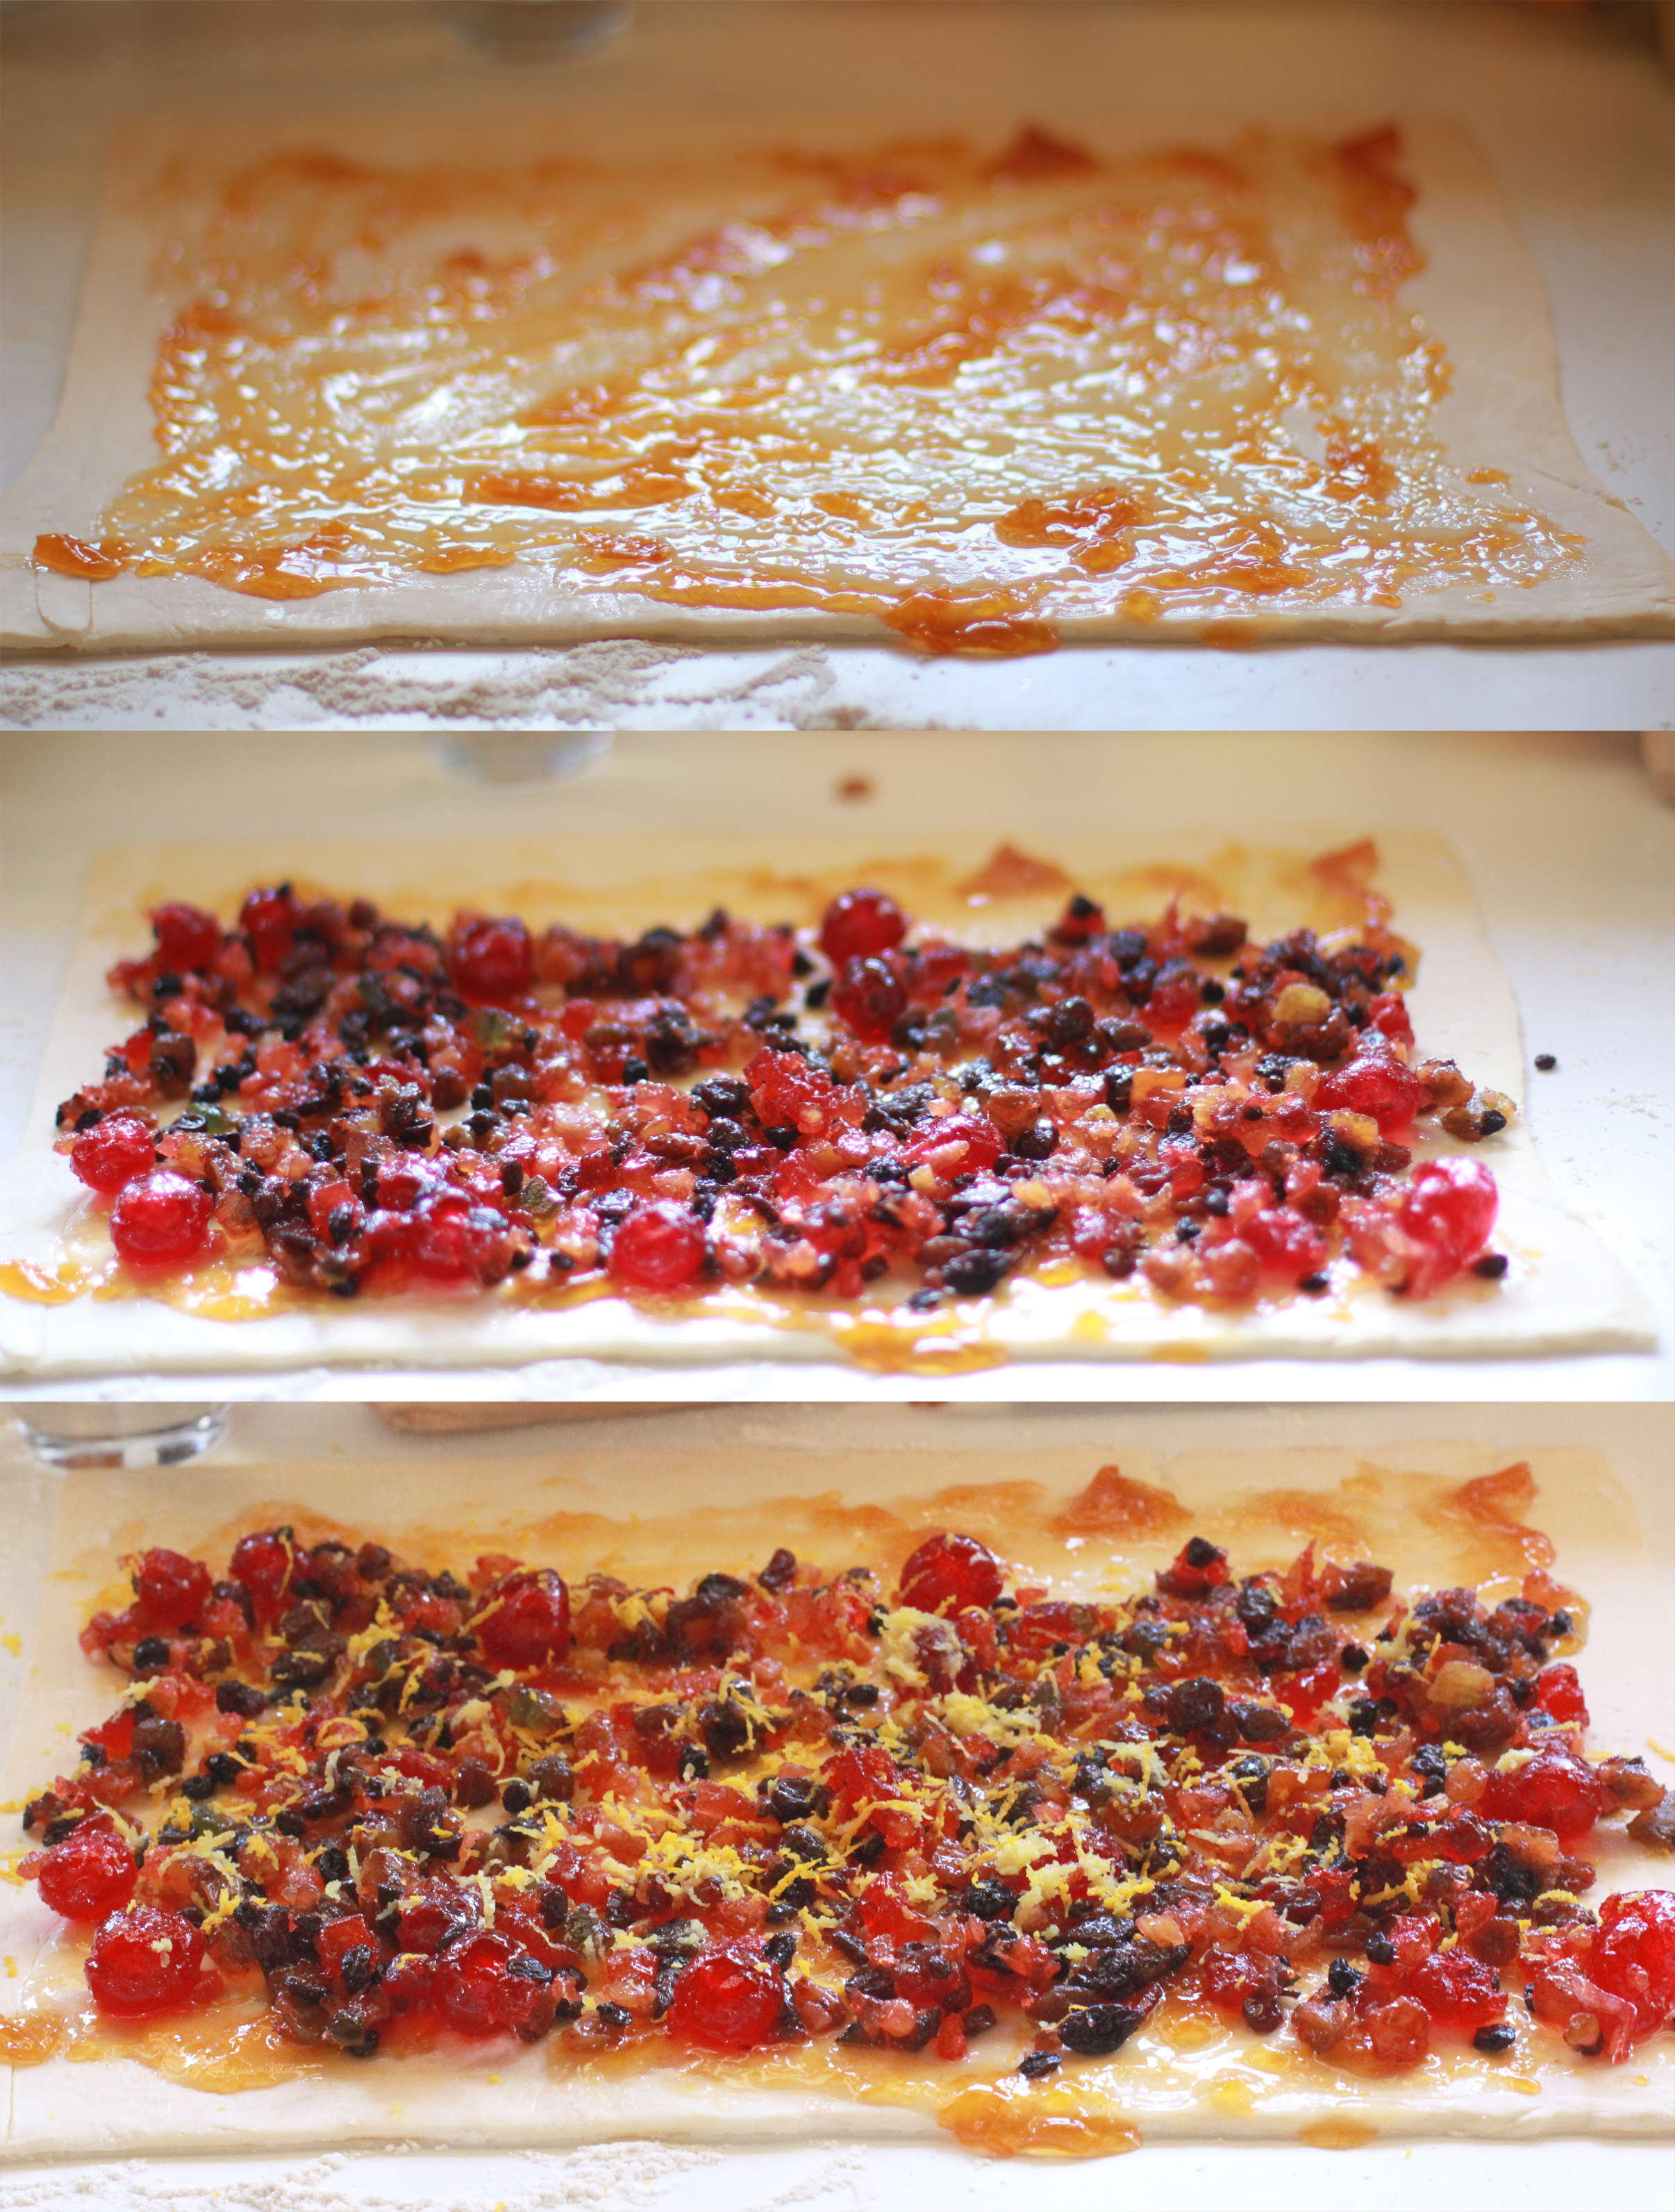
Very important when working with phyllo is to firstly defrost it overnight in your fridge, and once ready to use make sure you have a damp tea towel at hand to immediatly cover the sheets of phyllo as soon as you remove them from the plastic packet, if you don’t cover the flat opened sheets they will dry out quickly and stick together. I love working with phyllo, as long as you remember to cover it with that damp cloth.

Remove one sheet, and spoon one long line of sweet potato 5cm from the bottom of the pastry over the full lenght of the sheet, refer to the pic below, and roll it up tightly. Cut into 4 – 5 cm long pieces and pack the rolls into our dish. Make sure you cut the all the same length to create an even layer of little rolls stanking up in your dish…

The process...

The process…

Up to this stage you can prepare in advance, I would guess up to 3 or 4 hours before you need to serve….

About an hour before you need to serve, drizzle the cream over the sweet potato rolls and sprinkle with the 125ml of brown sugar, add a bit more sugar if the 125ml don’t seem to be enough, the cream will absorb into the phyllo and the brown sugar will turn into a crispy layer on top of the rolls… sweet crispness at the top and soft heaven inside…

The unbaked rolls sprinkled with brown sugar...

The unbaked rolls sprinkled with brown sugar…

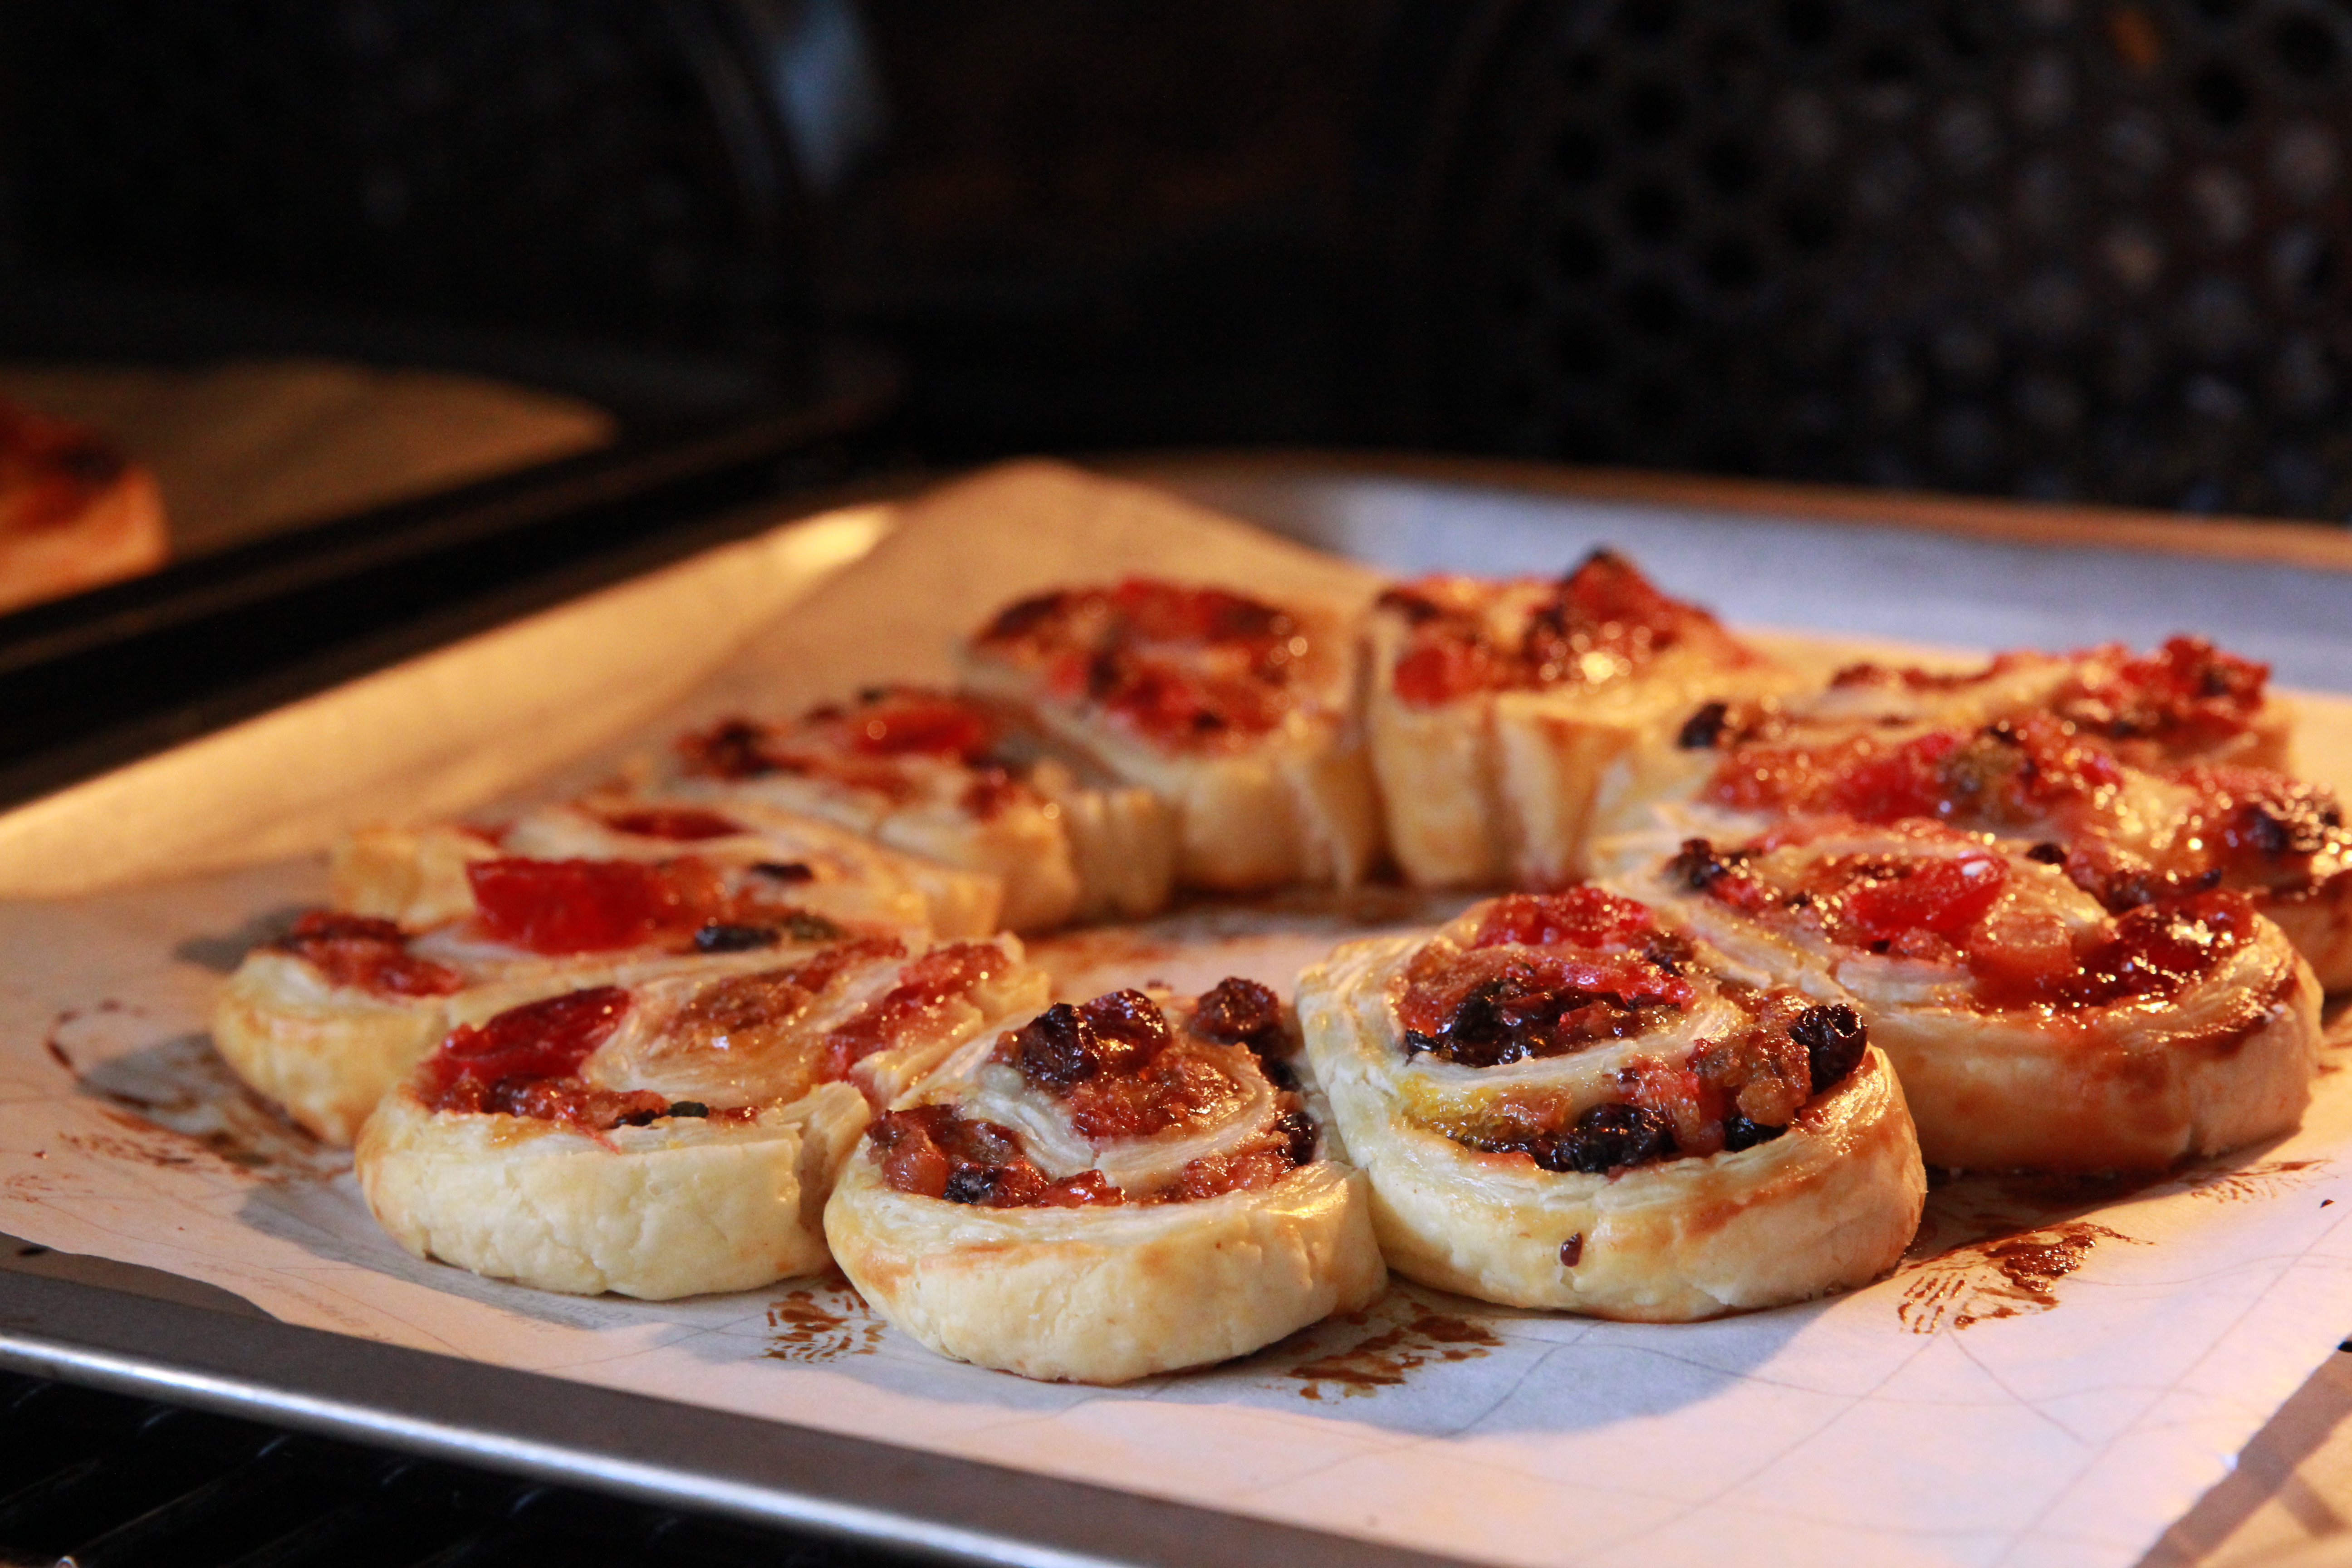
Bake for about 40 minutes at 180 degrees or until crisp at the top and all the cream absorbed into the pastry…

For a printable recipe card click on the PDF link below:
Sweet Potato and filo bake … RECIPE CARD

The crispy top

The crispy top

I loved this recipe so much that we made it on Friday night before Christmas at our “Christmas with friends” dinner and AGAIN on Tuesday for our Christmas Lunch….

Maryke, serving crispy prawn snacks...

Maryke, serving crispy prawn snacks…

Thanks to Ilse for always grabbing my camera and taking a couple of pics….(not a lot of people will be brave enough as they might get a growl), I don’t have a lot of pics of myself and really love the fun pics I find on my camera late at night when lying in bed and quickly scanning through the evenings pics on my camera…

Me and Bruce, thanks Ilse for taking the pic

Me and Bruce, thanks Ilse for taking the pic

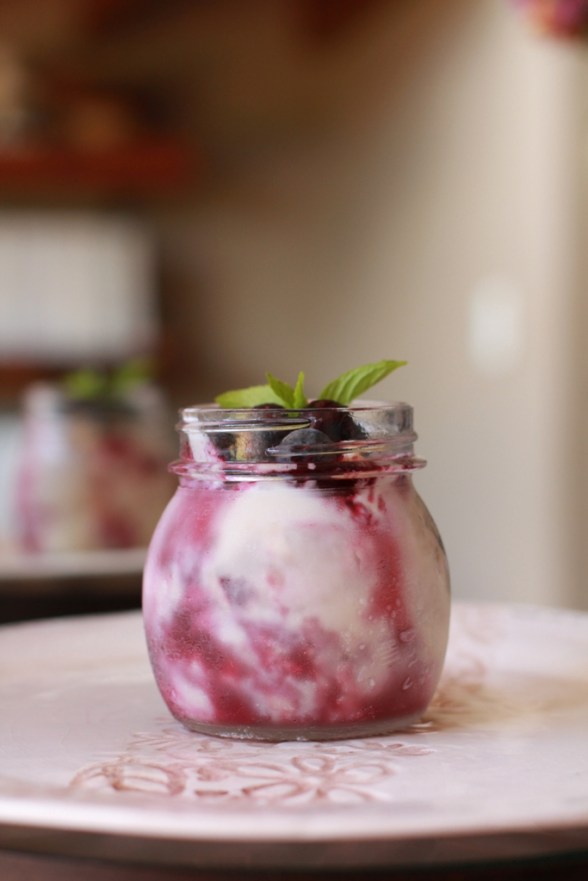
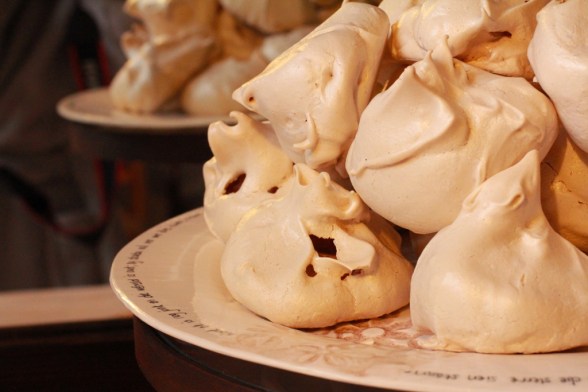
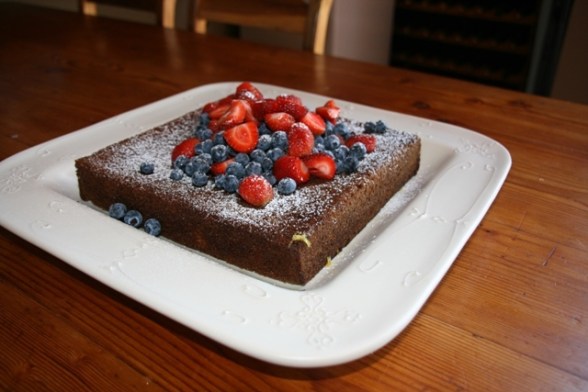
Now time for something sweet…

The yummy dessert.

The yummy dessert.

LET THE PARTY START!! But I’ve had a busy busy week… (one of the pics I found on my camera)

A find on my camera...

A find on my camera…

What a GREAT evening, I think we went home at 3…. the next morning….

11

And next year we will be back…. Thanks Maryke for your great food and Henk for the music that made us dance the night away…

9a

With 6 days to go before Christmas it is time to start wrapping those gifts…

Now is the time to get creative and start wrapping those gifts….

This year I’ve decided to keep the gift wrapping simple, a strong brown kraft paper and a red ribbon. Emma on the otherhand had different ideas and asked if she can do potato stamping on the gifts.

I usually cut the potato stamps freehand, but with a kitchen full of Christmas biscuit cutters I’ve tried to press the design of the biscuit cutter onto the potato and it worked so well that i will never do it differently.

Use Large potatoes, put the potato on a flat surface and slice off the top of the potato to expose as much “flesh” as possible. Select a cutter that fits onto the potato and firmly press the cutter into the potato as far as possible. Remove the cutter and with a small knife carefully cut away the potato around the pressed design. We’ve used white paint and stamped the designs onto the already wrapped gifts.. What fun and it only took about 30 minutes for me to cut and Emma to stamp all of the gifts.

No 1b. aartappeldruk

No 3. aartappeldruk

No 2. aartappeldruk

No 5. aartappeldruk

No 1a. aartappeldruk

No 8. aartappeldruk

Now the waiting starts… I LOVE Christmas!

Chickpeas, spinach and sweet potato… Part 3…. Cooking for Jacques and testing recipes for Chritsmas Lunch

This is the last recipe I would like to share with you from our late November Sunday lunch with Jacques, a great side dish for our chicken braai or the ideal “main meal” for my no meat friends like Melisse…

I’ve heard of this recipe from my sister, Liezel, she emailed it to me and said it is really worth a try, it is from a book I recommended to her by “Ottolenghi”, a great book, but being a bit of a “picture” girl I battle to cook from this book as I find that the pictures are very dull and non inspiring… a terrible thing to say I know, but the truth, and now I also need to say that EVERY recipe we’ve tried from this book is a real winner. So if you have the book, don’t look at the pictures, but do try the recipes as they are great….

I try out many recipes from books and magazines around me, and sometimes like with this recipe, you just know that it will become a favourite and real winner, so this one will most definately find a special place in my recipe file.

No 3. Garden

For the Chickpea, spinach and sweet potato dish, adapted from Ottolengi you will need:
1 tin drained chickpeas
2 tbsp olive oil
1 onion, finely chopped
1,5 tsp fine cumin
1 tsp fine coriander
1 tbsp tomato puree
400g tinned italian tomatoes
1 tsp castor sugar
100g baby spinach leaves
a handfull chopped coriander leaves
salt and pepper

500g sweet potatoes
water for cooking
50g butter
4 squeezes of honey
salt

No 2. chickpea spinach and sweet potato

Heat the olive oil in a large frying pan and add the onion, fine cumin and fine coriander. Saute until soft. Add the tomato puree, tinned tomatoes and sugar. Cook together for about 5 minutes, add salt, pepper and drained chickpeas. Add the spinach leaves, mix through and cook until wilted. Put to the side and warm through just before serving.

No 3. chickpea spinach and sweet potato

Peel the sweet potato, remember to keep the uncooked sweet potato covered with water to prevent browning. Slice the sweet potato into 4cm high rings, add to a saucepan, add the butter and drizzle with honey. Fry a little bit and then add boiling water to the saucepan, covering the sweet potato about 2/3’s… Cook with a lid on until cooked, don’t stir as you want the sweet potato to keep it’s shape, top up with water every now and then until cooked. Leave in the saucepan until just before serving.

Time to set the table…

No 2. Garden

Just before serving warm the tomato and sweet potato, use a flat shaped serving bowl, first add the tomato and chickpeas then top with the sweet potato, add a handfull of chopped fresh coriander. This dish can be served at room temperature but I prefer it slightly warm.

No 4. chickpea spinac and sweet potato

On perfect summer afternoons like this one our lunch can drag on till late afternoon…. then we quickly pack a platter of leftover’s and feed everyone again just before they need to go home, as tomorrow is Monday…

No 5. Garden

No 4. Garden

No 6. Garden

No 7. Garden

Jacques, it was great having you for lunch, hope we will see you in December for that cycle in our beautiful valley…..

For a printable recipe card click on the link below
Chickpea, spinach and sweet potatoe side dish RECIPE CARD

Homemade ice cream and meringue blueberry pots….Part 2….. Cooking for Jacques and testing recipes for Christmas Lunch

I could not wait to try out this new idea, originated from the Zest kitchen at Beaumont Wines, I love jars, any kind of jar and to serve food for a picnic or dessert like this is visually appealing to me.

The pots have layers of ice cream, broken up meringues (see part one), and a berry coulis, this is my “attempt” to re-create the Zest Jars… o and if you EVER need a great catering team, they are THE BEST!

For the little ice cream jars you will need:
Ice cream
410g evaporated milk, this must be very cold
250ml castor sugar
250ml double thick cream (I used normal whipping cream)
5ml vanilla essence (I used vanilla extract or a pod, just love the little black seeds)

Blueberry coulis
3 cups fresh or frozen blueberries
1.5 cups water
200 ml castor sugar
30 – 50ml of fresh lemon juice (to taste)

Gooey meringues
See part 1 for the gooooey meringue recipe, you can buy the meringues but please don’t get the white powdery ones, make sure it is a good quality meringue.

AND little jars for serving…

No 2. homemade icecream and mreinge post

For the ice cream, (recipe found it in one of our Local Magazines….) whip the evaporated milk, I prefer to use my Kenwood for this, you need a powerfull mixer to beat the evaporated milk into a cloud. Once thick add the castor sugar spoon by spoon, make sure you mix well after each spoonful, whip the cream seperately and fold into the whipped evaporated milk and sugar. Finally add the vanilla extract… and fold through. Pour into a chilled plastic container and freeze immediately, no need to stir this icecream like some recipes suggest, it is perfect….

Local grown blueberries from Lorraine Farm

Local grown blueberries from Lorraine Farm

Now for the berry coulis, boil together 3 cups of blueberries with 1.5 cups of water, for +/- 7 minutes. Use a potato masher and mash the cooked watery blueberries, this will crush open the soft blueberries and release the insides. Then strain them over a sieve to get rid of the skins, I use the back of a spoon to press the skins and force every little bit of liquid through the sieve. Now boil the strained runny blueberry liquid with 200ml of castor sugar for about 10 minutes until slightly reduced. Add the lemon juice and taste, add more if not sour enough, you want it sour as that is what works like magic with the sweet meringues and ice cream.

You need to give the icecream about 5 hours to freeze and the blueberry coulis needs to be cold…. THEN we pack the jars….

The process of packing the jars...

The process of packing the jars…

Pack layers of flat crushed gooooey meringue, layers of ice cream and the blueberry coulis, and another layer of flat crushed gooooey meringe , ice cream and blueberry coulis….. and freeze, I did not put the lids on the jars as I was worried that the lids will rust… and what is great, you can make everything up to this point a day in advance, even two if you want. I’ve kept one jar out for Mr Huxter, my blueberry grower and ice cream fanatic, and only managed to get it to him 4 days later, and need I say that there was a little bit of a fight over who’s spoon goes in first between him and Issie…

My good friend, suggested we add some mint to add colour to my pics...

My good friend, suggested we add some mint to add colour to my pics…

At dessert time, all you need to do is remove the jars from the freezer and serve, add frozen or fresh whole blueberries on top and mint for pretty pics as Shannon said.

Someone could not wait for their jars...

Someone could not wait for their jars…

These jars seems to be a bit of an effort, and to be honest they are, but really easy and so worth it…

The secret is in the quality of the meringues and icecream, you can go the quick way but believe me the taste of the homemade version is just soooooo worth it.

No 7. homemade icecream pots

Jacques, next time I will serve the ice cream jars as the “starter” then you can take your time enjoying them as there won’t be any need to rush to catch that plane back to Johannesburg…

No 8. homemade icecream pots

What a wonderful idea, thanks to the Zest girls….

Printable PDF recipe card, click on the link below…
8. Ice cream, blueberry and meringue jarsRECIPE CARD

Gooey meringues… Part 1…… Cooking for Jacques and testing recipes for Christmas Lunch…

I’ve tried and tested this recipe several times before I got the timing right, yes the goooooeyness is all in the baking time…..

We invited Jacques, a brother of a GOOD FRIEND, for lunch, and what better time to try out those frozen homemade icecream and meringue pots I’ve ordered from the Zest Kitchen at The Beaumont Wines’s open gardens day in early November…. I don’t have the recipe but will give it a go….

It start with baking gooooey meringes

For the Gooooey meringes you will need:

8 egg whites at room temperature
240 g castor sugar
240 g sifted icing sugar
5ml of cacao powder
2.5ml vanilla paste or half scraped out vanilla pod

Seperate the eggs and beat the egg whites until soft peaks. Mix together the castor sugar, icing sugar and cacao and spoon tablespoons full of the sugary dry mixture into the egg whites while continiously mixing, I use my Kenwood on a high speed, but you can use any “freestanding” electric mixer.

By slowly adding the dry ingredients while continiously mixing, the egg whites will turn into a shiney stiff sugary cloud…. mix in the vanilla…

Preheat the oven to 120 degrees.

Spoon egg size dollops of meringue onto a baking tray, I prefer not to use baking paper for these. Use two tablespoons, and scrape the egg size dollop out of the other spoon onto the try, make a twirly point at the top of the meringe by circling the meringe with one of the spoons.

The meringues will double in size, so make sure you leave enough space so they don’t “climb on top of each other”.

Bake for 1 hour 15 minutes at 120 degrees. Do not open the oven door, leave to cool for 2 hours before taking them out.

After 2 hours, remove the meringues from the oven and store in an airtight container.

Click on the recipe card in PDF for a printable recipe card.
Gooooey Meringues RECIPE CARD

And this is what these meringues turned into, recipe to follow later…

Gooey meringe, homemade icecream and blueberry coulis pots…

Christmas inspiration….

Surprise your friends with a beautiful invite to an early “Christmas celebration with friends”. I wish I have the time to do this every year, the fun of planning an “early” Christmas Dinner is nearly more exciting to me than the dinner itself….

Flashy fab invites, dress up, the garden filled with tiny fairy lights…. and good friends…

A tray filled with shotglasses full of baberton daisies… one per place setting..

Christmas should be RED….

The table under the tree…

The weather…. WILL play along…. (lets hope)

Pretty…

Fill the table with homemade menu’s, nametags, individual flowers, small gifts…..

I love looooong tables, this one should have been longer… with white flowing tablecloths.

Plan, plan plan ahead.

The very important “drinks table”…

And go all out for your friends….

As this night they will remember and always be thankful for being on the “invite list”…

Fill the garden with brown paper bags, filled with sand and candles..

And friends will chat the night away…

Thanks to Liezel for taking the pics for me, as I was running around to get the well planned 5 course dinner on the table….

I LOVE Christmas.

SO, there’s more than enough time to plan your “early Christmas Dinner for friends” this year, they will love you for doing it.

And pleasssssse invite me too.

Orange cake ……. (light, easy, moist and delicious!)

This light summer orange cake is ideal for lazy Christmas holiday afternoons. I love making this cake as a gift when we get invited to a summer lunch…. Even if your host serve dessert, this light cake will go down well with late afternoon coffee…

For the Orange Cake you will need:

1 cup sugar
1 cup soft butter
3 eggs
1 cup sour cream
1 + 3/4 cup cake flour
1 teaspoon bicarb of soda
1 teaspoon baking powder
rind of 2 oranges

Cream together the sugar and butter until light and fluffy. Add the eggs, sourcream and orange rind. Mix well. Add the sifted flour, bicarb of soda and baking powder and combine with butter / sugar mixture. Bake in a greased square tin for about 45 minutes.

While the cake is baking prepare the orange syrup:
Simmer together for about 5 minutes, the juice of 2 oranges, juice of 1 lemon, 3/4 cup of sugar and a pinch of salt.

Let the warm cake rest for 15 minutes, turn the cake out of the tin onto a pretty flat serving platter. Pour the warm syrup over the cake.

Serve with fresh berries and a dusting of icing sugar… and a dollop of cream, but not really necessary…

Light, orangy, plain and simple afternoon tea cake….

Click on the recipe card link for a printable PDF recipe card
Orange cake RECIPE CARD

Or serve this lovely orange cake as a light Christmas eve dessert, beautifull and full of Christmas colours and flavours….

Christmas tree biscuits and burger lollies……

I love Christmas, and what better way to start the Christmas spirit by baking these beautiful Christmas tree biscuits with the kids…. I think Emma will bake and ice biscuits every day till Christmas if I allow her to.

This was the second year that we’ve iced Christmas Tree biscuits, and I think it will become an annual event for the first weekend in November, I am not sure who was the most excited about this years “icing”, me or Emma, she wanted to invite her whole class from school.

Bake basic sweet sugar biscuits from your favourite recipe or use the following recipe:
250g butter
1 cup castor sugar
2 eggs
2.5ml vanilla
2 cups flour
salt

Cream the butter and sugar, add the eggs and vanilla, and mix well.
Add the sifted flour and salt. Mix and cover with cling wrap. Rest for 1 hour in a cool area.

Dust the table and rolling pin with flour and roll the dough until +/- 4mm thick. Cut the shapes with pretty Christmas cutters.
Bake in a preheated oven for 15 minutes on baking paper. Remove from oven, the biscuits will still feel soft to the touch, let it cool.

The Rust and De Villiers families joined us this year, thanks to Caroline for baking “extra” biscuits as you can never have enough….

I lined the table with baking paper, and added little bowls of “anything I could find in my cupboard” for decoration, including edible glitter which will sparkle on the Christmas Tree.

Gifts from my guests…

Yummy messssss

Everyone got into it, even the adults…

Ari licked till right at the end, I think if I send the roll of waxed paper home with her she would have licked it clean by the next morning….

I love these lollipop burgers, ideal “make ahead” to braai quickly after the biscuit icing marathon….. Thanks to Magriet Cherry for this clever idea, originally served with pita breads…

Lollipop burgers…

It does not matter HOW busy I am, there will always be dessert….. I think I am in love with this flat lemon cheesecake from Donna Hay….. and make it whenever I can

I am sure the kids will dream tonight of Christmas and biscuits sparkling full of glitter on the Christmas tree.

Sweet dreams little Emma…

Now the BIG job start of packing out and decorating this year’s Christmas Tree….